Jamberry nails have been quite the popular item these days, it’s hard to find someone that hasn’t seen them or been invited to a party. But what is the big deal anyway? I’m such a sucker for hype so of course I had to give them a try.
I’ll be honest – I don’t like all the crazy prints on nails, nor do I like different nails looking different – these seem to be two very big reasons people get Jamberry nails so the biggest selling point doesn’t work for me.
I do how ever like French nail, and occasionally glitter but damn I hate how glitter polish has to essentially be scrapped off. So when I saw both of the options in the Jamberry catalogue I decided to finally break down and give them a try. Each sheet of nails is said to be enough for 2 manicures, 2 pedicures and 4 accent nails and cost $15, or you can get buy 3 get one which is what I did, with tax and shipping its about $13.50 per sheet.
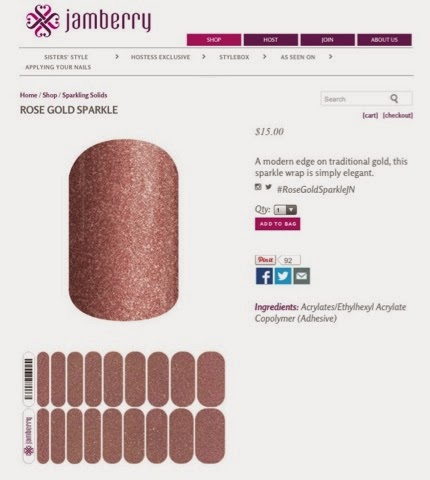
For my first application I decided a solid would be better than worrying about lining up the French tips so I choose rose gold sparkle, here is what it looks like in the catalogue:
To apply I followed the Jamberry instructions but found that I had to do a lot of pressing to get the nails to stick. I wound up heating the tip of my nail scissors with my hair dryer and pressing it around the edges on each nail. To trim the nails I actually used nail clippers and did NOT trim my nails before application but rather after the decal was applied, this clipped off the tips that were having trouble sticking. Overall I spend about 15 minutes on the application.
How my nails look to people I might encounter:
Close up:
The other hand:
The best nail in the bunch:
So, as you can tell some nails fit better than others, this is a big annoyance for me. Some people make a trace of their nail on something clear and then trim the decals for a perfect fit, I guess if I was serious about it I could have done that. Application is certainly not easier than polish.
What is nice is to not having to worry about drying time of smuding nails, which I seem to do even after they have been painted a lot. A big pro is also supposed to be that these wont chip, now it’s only been a day so I’ll have to revisit that and see how they stand the test of time.
What I don’t like about using these is that it doesn’t replace an actual manicure, I’ll admit I suck at dealing with cuticles. I don’t think I’m fooling anyone, it looks like I did my nails at home. I’m not one to paint my nails on the regular – mostly I get manicures for special occasions and I don’t see this product ever replacing that. So, it’s good for just day to day nail fashion IMO. To me, that’s not something that I care about enough to make an investment in.
One week post application here’s what my nails look like:
It’s not “chipped” per say but it doesn’t look like the decal is growing with my nail. Maybe this is because I did the clipping at application time but damn, I couldn’t get them to seal otherwise. After I took the pic I pealed them off.Removing was by far the easiest step.
Overall, these weren’t enough of a pain that I won’t use the decal I already have but at the price point I don’t see myself buying more as I’d rather spend a little more and get a real manicure. Each sheet is supposed to cover 2 manicures, 2 pedicures and 4 accent nails. I will never do accent nails. For toes, it involves a lot of cutting up the left over decals, meh. So really, I can do my nails twice with each sheet. Since I don’t get manicures regularly these weren’t a money saving item for me but an additional expense. Ultimately I just think I’m out of the target market for this product – people who like their nails done on a regular basis and like lots of designs.


